Ingredients
- 2 pounds (1 kg) best-quality non-GMO dried soybeans
- 2 teaspoons best-quality organic miso (or previous year’s homemade) to use as seed miso for the new batch
- 2 pounds (1 kg) brown rice koji, white rice koji, or barley koji*
- 14 ounces (400 g) fine white sea salt
Instructions
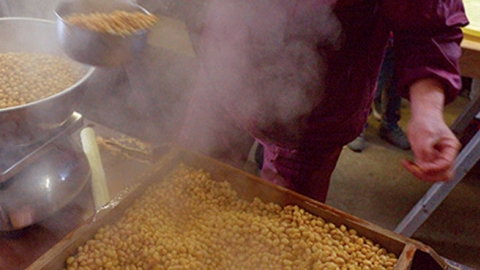
Soak the soybeans for 18 hours in a large pot of cold filtered water. Drain the beans, return them to the pot, and refill the pot to about 5 inches (10 cm) above the beans. Bring to a boil over high heat, lower to a simmer, and cook for about 1 1/2 to 2 hours, uncovered, until the beans are soft. While the beans are cooking, slowly whisk 1/2 cup (125 cc) of hot water into the 2 teaspoons seed miso and cool to room temperature (the solution should be like a very thin miso soup in consistency).
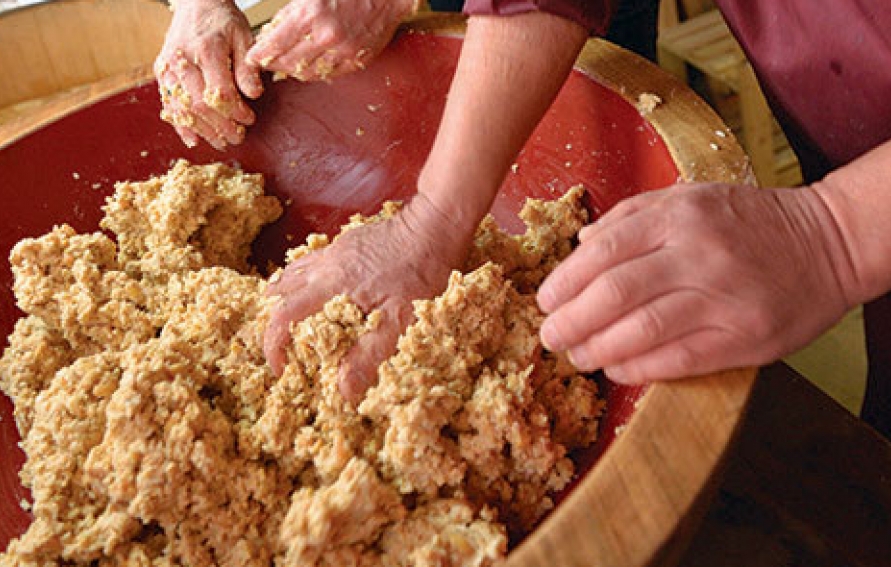
Drain the cooked beans and mash them in batches to a coarse consistency using a bean masher, a Japanese grinding bowl (suribachi), or just by flattening the beans between your thumb and index finger. When the beans are smashed to your satisfaction (chunky or smooth), they will also be cooled enough to measure in the rice koji–they should be just off warm at the most (too hot and it kills the spores). Sprinkle in about 80% of the salt along with the seed miso (miso thinned with water). Knead well to distribute the rice koji and salt with the mashed beans.
Form tennis ball–sized spheres of bean mash and throw them into a large crockery pot, small wooden barrel, or food-grade plastic vat with all of your might. You are looking for a satisfying splat that sounds like thunk rather than a weak glurp. The bean mash should only fill the container about half full. Pat down the surface of the mash with the flat of your palm and sprinkle with the remaining 20% portion of salt.
Smooth a clean muslin cloth across the surface of the mash and let it drape down over the sides of the container to keep out flying leaves or other debris. Place a wooden or plastic drop lid on top of the cloth-covered mash surface and weight evenly with 4 1/2 pounds (2 kg) of rocks or other heavy objects. Cover with one more large muslin cloth and wind some twine a couple of times around the circumference of the barrel to tie the cloth in place. The cloth will act as a mold barrier and will become scarily dusted with green mold spores, so don’t skip or replace with plastic. Carefully remove to wash when you stir the miso.
Let the young miso sit undisturbed in a shaded area outside until the weather warms. From May, start stirring the miso about once a month to avoid mold as the fermentation arc starts to ramp up. During the hottest period, you should probably stir the miso (from the bottom up) every 2 weeks to avoid mold forming. Ideally the weather should become muggy, and the temperatures should rise to about 100°F (38°C) at the height of the summer. But avoid direct sunlight. If you see any mold on the surface, carefully scrape it off. If needed, wipe the inside walls of the container with a vodka- or shochu-soaked cloth to deter mold.
Check the miso after the summer to see if it has mellowed to your liking. At this point, you can refrigerate it or remove the weights and leave in its fermenting container until you start your next batch the coming winter.
About this recipe
*Mitoku organic brown rice koji and barley koji can be ordered through the Natural Import Company. White rice koji is available online.
Excerpted from Preserving the Japanese Way: Traditions of Salting, Fermenting, and Pickling for the Modern Kitchen, by Nancy Singleton Hachisu/Andrews McMeel Publishing, LLC


